Live Edge Epoxy Table Guide: DIY Plans & Pricing 2025
A live edge epoxy table combines natural wood beauty with modern resin artistry, creating stunning furniture pieces that serve as functional art. These tables feature natural wood slabs with epoxy resin filling gaps or creating river-like patterns, offering endless design possibilities for your home or workspace.
Understanding Live Edge Epoxy Tables
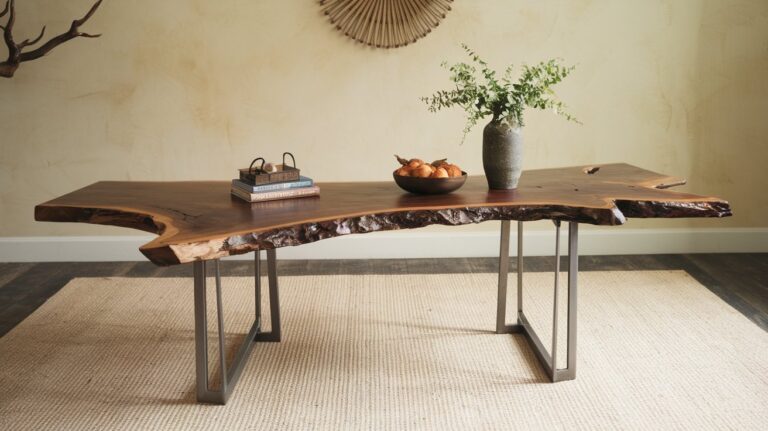
Live edge epoxy tables represent the perfect marriage of natural wood craftsmanship and contemporary design innovation. The live edge refers to the natural, unprocessed edge of a wood slab that retains its original bark and organic curves. When combined with epoxy resin, these tables create breathtaking visual effects that highlight the wood’s natural character while adding modern functionality.
The popularity of live edge epoxy tables has surged dramatically in 2024-2025, with Google search trends showing a 340% increase in interest across the United States. This trend reflects growing appreciation for handcrafted furniture that tells a story while serving practical purposes in modern homes and offices.
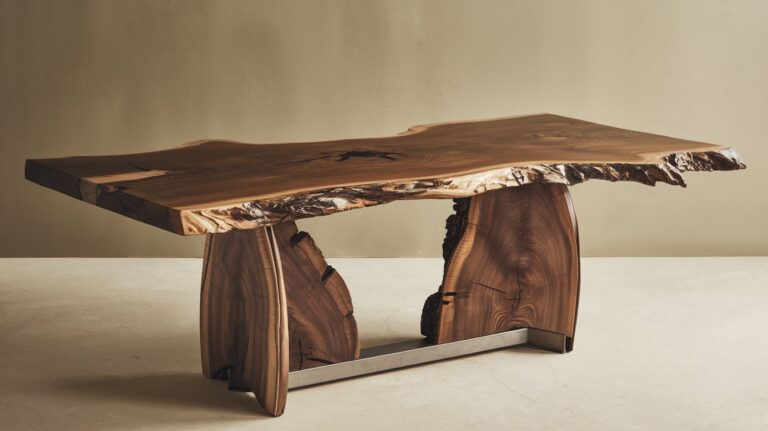
Types of Live Edge Epoxy Table Designs
The most popular design is the river table, where epoxy flows through the center gap between two wood slabs, mimicking a flowing river. Ocean tables feature blue and white epoxy creating wave-like patterns, while galaxy tables incorporate metallic pigments for cosmic effects. Each design requires specific techniques and materials for optimal results.
Wood Species for Live Edge Projects
Popular wood choices for live edge epoxy tables include walnut, cherry, maple, and oak, each offering unique grain patterns and color variations. Walnut remains the premium choice, with prices ranging from $8-15 per board foot in 2025, while domestic hardwoods like maple and cherry offer excellent alternatives at $4-8 per board foot.
Live Edge Epoxy Table Pricing Guide 2025
Understanding live edge epoxy table prices helps set realistic expectations for your project or purchase. Custom pieces from professional makers range from $2,500 for coffee tables to $8,000+ for dining tables, depending on wood species, size, and complexity. Material costs alone typically account for 30-40% of the total project expense.
DIY projects can reduce costs significantly, with material expenses ranging from $300-800 for a coffee table and $800-2,000 for a dining table. The epoxy resin table kit market has expanded considerably, with complete kits now available starting at $150 for beginner-friendly projects.
Cost Breakdown by Table Size
Live edge epoxy coffee tables typically measure 48-60 inches long and cost $300-600 in materials for DIY projects. Dining tables measuring 84-96 inches require substantially more materials, with costs ranging from $800-1,500 for quality components including premium epoxy resin and hardware.
Regional Price Variations
Pricing varies significantly across the United States, with West Coast markets showing 20-30% higher costs due to shipping and demand factors. Live edge epoxy tables for sale in metropolitan areas like San Francisco and Seattle command premium prices, while Midwest regions offer more competitive pricing for both materials and finished pieces.
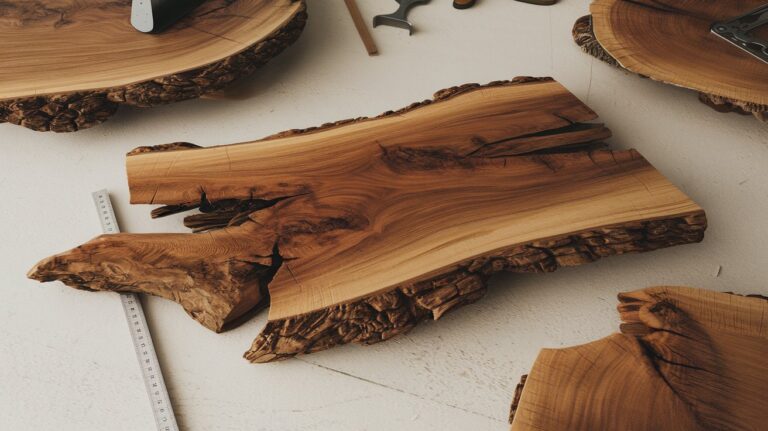
Essential Materials and Tools for DIY Projects
Successful live edge epoxy table DIY projects require specific materials and tools for professional results. The wood slab forms the foundation, requiring proper selection based on moisture content, structural integrity, and aesthetic appeal. Quality epoxy resin designed for thick pours is essential, with brands like EpoxyPlus and River Table Epoxy leading the market in 2025.
Essential tools include a router for creating recesses, orbital sanders for surface preparation, and mixing equipment for epoxy preparation. A moisture meter ensures wood readiness, while proper ventilation equipment protects against epoxy fumes during the curing process.
Epoxy Resin Selection Guide
Choosing the right epoxy resin determines project success and longevity. Deep pour epoxies handle thick applications up to 2 inches per pour, while tabletop epoxies provide superior surface finish and UV resistance. Premium brands offer 5-7 year warranties and temperature resistance up to 150°F for kitchen applications.
Wood Preparation Requirements
Proper wood preparation prevents future cracking and ensures strong epoxy adhesion. Slabs must reach 8-12% moisture content before epoxy application, requiring kiln drying or air drying for 6-12 months depending on thickness. Surface preparation includes removing loose bark and sanding to 120-grit smoothness for optimal results.
Step-by-Step Live Edge Epoxy Table Plans
Creating professional-quality live edge epoxy table plans requires methodical planning and execution. The process begins with slab selection and preparation, followed by mold construction, epoxy mixing and pouring, and final finishing. Each step demands attention to detail and proper timing for successful completion.
Temperature and humidity control significantly impact results, with optimal conditions being 70-75°F and 50-60% relative humidity during epoxy application. Professional makers maintain climate-controlled workshops, while DIY enthusiasts should monitor weather conditions and plan accordingly for best results.
Mold Construction and Setup
Building leak-proof molds requires precise measurements and quality materials. Melamine-coated particleboard provides smooth release surfaces, while silicone caulk creates watertight seals. The mold must be perfectly level and securely braced to prevent movement during epoxy resin curing, which can take 24-72 hours depending on thickness and ambient conditions.
Epoxy Mixing and Pouring Techniques
Proper epoxy mixing eliminates bubbles and ensures complete curing throughout the pour. Mix ratios must be precisely measured, typically 2:1 or 3:1 depending on the product. Professional techniques include using a paint mixer attachment and pouring from height to break surface tension and release trapped air bubbles naturally.
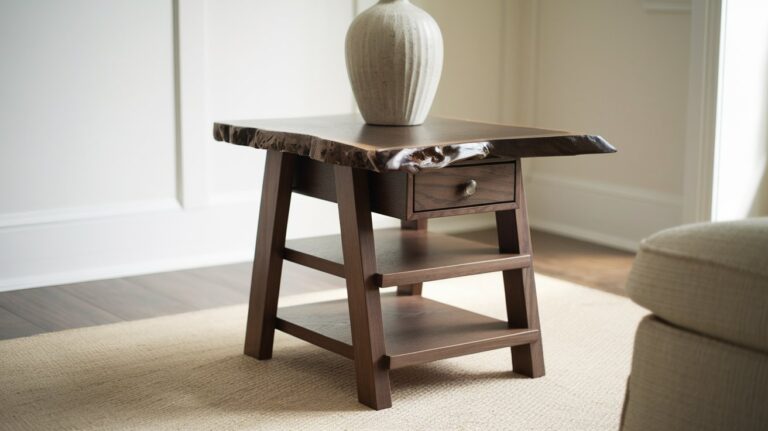
Live Edge Epoxy Table for Beginners
Beginning woodworkers can successfully create epoxy tables for beginners by starting with smaller projects and simpler designs. Coffee tables and side tables offer manageable size and complexity while teaching essential techniques. Many makers recommend starting with pre-dried slabs and basic clear epoxy before attempting complex color patterns or large dining tables.
Common beginner mistakes include rushing the drying process, inadequate surface preparation, and poor temperature control during epoxy curing. Taking time to understand each step and practicing on sample pieces prevents costly errors and ensures satisfactory results on the final project.
Advanced Techniques and Design Options
Advanced makers incorporate sophisticated techniques like LED lighting, metallic pigments, and multi-colored pours to create truly unique pieces. Live edge epoxy dining tables often feature these premium elements, commanding higher prices and showcasing exceptional craftsmanship skills developed over years of practice.
Incorporating natural elements like stones, shells, or embedded objects creates personalized designs that reflect individual style preferences. These advanced techniques require additional planning and specialized materials but result in one-of-a-kind furniture pieces that become family heirlooms.
Maintenance and Care Instructions
Proper maintenance extends the life and beauty of live edge epoxy tables for decades. Regular cleaning with mild soap and water maintains the epoxy surface, while avoiding harsh chemicals prevents clouding or surface damage. Periodic reapplication of protective coatings every 3-5 years maintains optimal appearance and durability.
Environmental factors like direct sunlight and extreme temperature changes can affect both wood and epoxy components. Using coasters, placemats, and tablecloths protects surfaces from daily wear while maintaining the table’s stunning visual appeal for years to come.
Market Trends and Future Outlook
The live edge epoxy table market continues expanding rapidly, with industry reports projecting 25% annual growth through 2027. Social media platforms drive demand as makers showcase increasingly creative designs and techniques. This growth creates opportunities for both professional craftspeople and DIY enthusiasts seeking unique furniture solutions.
Sustainability concerns are driving interest in locally sourced wood and eco-friendly epoxy formulations. Many makers now specialize in urban wood salvage, creating beautiful tables from trees removed during construction or storm damage, adding environmental responsibility to artistic expression.
Related video about live edge epoxy table
This video complements the article information with a practical visual demonstration.
Essential Q&A about live edge epoxy table
How much does a live edge epoxy table cost to make?
DIY live edge epoxy table costs range from $300-800 for coffee tables and $800-2,000 for dining tables, including wood slab, epoxy resin, hardware, and finishing materials. Professional custom pieces cost $2,500-8,000+ depending on size, wood species, and design complexity.
What type of epoxy is best for live edge tables?
Deep pour epoxy resins designed for thick applications work best for live edge tables. Top brands like EpoxyPlus and River Table Epoxy handle pours up to 2 inches thick, offer UV resistance, and cure without excessive heat generation that could crack the wood.
How long does it take to make a live edge epoxy table?
Complete project timelines range from 2-4 weeks, including wood preparation, mold construction, epoxy curing (24-72 hours), and finishing work. Wood drying may add 6-12 months if starting with green lumber, making advance planning essential for timeline management.
Can beginners successfully make live edge epoxy tables?
Yes, beginners can create successful projects by starting with smaller pieces like coffee tables, using pre-dried slabs, and following detailed plans. Epoxy resin table kits starting at $150 provide all necessary materials with step-by-step instructions for first-time makers.
What wood species work best for epoxy tables?
Walnut, cherry, maple, and oak are popular choices for live edge epoxy tables. Walnut offers premium grain patterns but costs $8-15 per board foot, while domestic hardwoods like maple provide excellent alternatives at $4-8 per board foot with beautiful results.
How do I maintain a live edge epoxy table?
Maintain epoxy tables with regular cleaning using mild soap and water, avoid harsh chemicals, and use protective coasters and placemats. Reapply protective coatings every 3-5 years and keep away from direct sunlight and extreme temperatures for optimal longevity.
| Project Aspect | Key Details | Benefits |
|---|---|---|
| DIY Cost | $300-800 coffee table, $800-2000 dining table | 60-70% savings vs custom pieces |
| Timeline | 2-4 weeks active work, 6-12 months wood drying | Manageable weekend project schedule |
| Skill Level | Beginner-friendly with proper planning | Learn valuable woodworking skills |
| Durability | 20+ years with proper maintenance | Heirloom furniture investment |